All Posts By

fergusfalls

Food Aggression

By Uncategorized No Comments

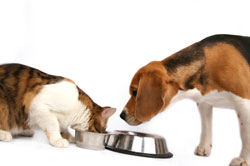
Do you have a pet in your home that is guarding of their food or treats? Some dogs may display these aggressive behaviors well into adulthood but the good news is that this behavior can be resolved. The following explains a few tips and advice for coping with food aggression behaviors.

In a feeding situation, it is best to remove any possible conflict from the area. When feeding time is over, be sure to remove or put away the food bowl. It is important that your dog is fed at regular scheduled times; not free fed. When food is being prepped, try to keep the pet in a separate room or even outside the house entirely. Once food is ready, you may then place the food bowl in a secure location like a bedroom with a door lock or  in his crate.  This is particularly important for homes with small children. Once your pet has finished his food and is now out of sight from the food bowl, it can be safely removed from the room or crate. Do not feed your pet in the presents of people or other pets in the home. This technique may need to be a long term lifestyle to help reduce the stress and anxiety to the pet during feeding time.

In less severe aggressive situations, retraining may be all that is needed. For example, try splitting up the meal into multiple smaller meals. For this technique, command the dog to sit/stay. Pour a portion of the food into the bowl, set the bowl down on the floor and back away 2-4 feet. Release your dog from the sit/stay command to allow to eat while you stay put at a distance. Once he has finished the portion of food, command the dog to sit/stay away from the food bowl. Again, pour another portion into the food bowl and then back away. Continue these steps until the full meal has been finished. Always give praise (in verbal form at this time) when he has done what is commanded.  Occasionally, you may add a treat into one of the portions for reward. If at anytime your pet shows signs of aggression, end the session immediately and remove the bowl once he has backed away from it. Trying to remove the bowl or treat while he is eating may increase his anxiety and aggression.

Training sessions should progress to the point of you being able to stand closer to him at each session. For instance, once he feels comfortable with you standing 4 feet away at each meal, try standing only 3 feet away at the next meal time and so forth. Eventually, you should be able to stand beside him while the food bowl is lifted, added, refilled, or given treats. Keep using the sit/stay command before allowing him to eat and only use small portions at a time. If all of this has been successful, move onto larger portions and try to get him to pause while eating with verbal commands or by leash or halter. When he sits down, you may add more food or offer a special treat.  It may not be safe to progress to petting the dog during eating or walking away and re-approaching quite yet. At no point should you reprimand your dog for negative behavior; give positive reinforcement (praise or treat) only. Again, if negative behavior starts, simply end the session and remove the bowl.

Other techniques may include feeding a meal by hand. This technique should only be done if your dog shows zero sign of anxiety. If he becomes comfortable with this, graduate to placing a portion of food into the bowl directly by hand. Move in slow calm movements so as to not startle him or increase his anxiety.

Dealing with any aggressive behaviors takes time and patience. Always use positive reinforcement for best results and do not use these techniques if your dog tries to lunge or attack as you approach.



Helping your grieving pet

By Uncategorized No Comments

Losing a pet can be tough on everyone in the family, including our other pets.  While they may not fully grasp the significance of the loss, it’s clear they grieve in their own way.

Pets develop relationships much like we do with each other or other animals. As many of our pets are confined to our homes, their furry siblings are their whole universe. They recognize their position in the family and find comfort in stability. The surviving pet may display signs of distress or anxiety and often play off of our emotions of sadness. Pets, especially dogs respond to death much like human toddlers respond. They may not totally grasp the concept of forever loss but feel the sense of the current loss.

Our pets do not share their thoughts with us verbally, so seeing the signs of grief may be difficult at first. Here are some things to watch for should you lose a furry family member.

Change in appetite

This may include a decreased appetite to completely going off food all together.

Changes in vocalization

Cats and dogs may bark, meow, or howl more than usual.

Changes in habits

Some pets may begin to sleep more than usual. Some pets may be affected differently and may pace more. Some will go into hiding or sulk.

Changes in personality

In a study it was shown that 60% of animals who have lost a companion pet have clung to their humans more. On the other hand, some have withdrawn their attention. Some may become destructive.


How can I help my grieving pet?

Here are some tips:

Provide a closure

If possible, let your pet see the body of the deceased pet. One last visit may help him/her to understand that his friend is gone.

Control your emotions

It may be easy to lean on your pet for emotional support but try to keep it short. Speak in upbeat tones to your pet and be aware at how your pet responds to your voice/emotions.

Spend quality time with your pet

Spending time with your pet during the grieving process is as important to them as it is to you. Be careful not to reinforce unwanted behavior. Try something new like introducing a new toy or treat, taking a walk on a different path or scoping out a new park. Also make sure to keep your same routine. Pets like familiarity and sticking to the same routine you had before and trying not to disrupt the daily schedule.


Seek out help should your pet go days without eating or have continued behavior or attitude changes.


Contributors: Lynn Buzhardt, DVM
© Copyright 2020 LifeLearn Inc. Used and/or modified with permission under license.


Essential Oil Poisoning in Cats

By Uncategorized No Comments

Essential oils are the concentrated liquids of plants. Essential oils have become popular for their use in aromatherapy and alternative medicine; they are also used in cleaning products, food and drink flavorings, herbal remedies, perfumes, personal care products, and liquid potpourris used as home air fresheners and fragrances. Many of them are found in natural care products for pets as well.

Many liquid potpourri products and essential oils, including oil of cinnamon, citrus, pennyroyal, peppermint, pine, sweet birch, tea tree (melaleuca), and wintergreen are poisonous to cats. Both ingestion and skin exposure can be toxic.

How hazardous are essential oils to cats?

Essential oils contain chemicals that are rapidly absorbed orally or through the skin. Many of these chemicals are metabolized through the liver. Cats are particularly sensitive to essential oils as they lack some of the liver enzymes necessary to effectively metabolize these oils. Additionally, very young cats and kittens, and cats with liver disease are more sensitive to their effects. Some essential oils can also irritate or burn the skin and mouth.

Only a couple of licks or a small amount on the skin could be harmful to a cat, depending on the ingredients in a specific product and how the pet is exposed. Cats can be exposed by tasting liquid potpourri as it simmers or by coming in contact with liquid from leaking or overturned containers. Cats in particular are prolific self-groomers, so if these products get on their skin, they will often ingest them.

Symptoms may include:

  • difficulty breathing
  • difficulty walking or uncoordinated gait
  • drooling
  • lethargy or weakness
  • muscle tremors
  • pawing at the mouth or face
  • redness or burns on the lips, gums, tongue, or skin
  • vomiting

    What should I do if I suspect that my cat has been exposed to essential oils or liquid potpourri?

    Rapid diagnosis and treatment are imperative. If you believe that your cat has ingested or come in contact with essential oils or liquid potpourri, call your veterinarian or Pet Poison Helpline (800-213-6680) immediately. The sooner you seek treatment, the better the prognosis and outcome for your cat.

    The sooner you seek treatment, the better the prognosis and outcome for your cat.

  • Do not induce vomiting or give activated charcoal to your cat. This may worsen your cat’s condition.
  • Put the product packaging in a sealed plastic bag, and take it with you to the veterinary clinic.
  • If any product is on the skin or fur, quickly wash it off using hand dishwashing detergent.

Your veterinarian may perform blood work to determine if the liver and kidneys have been affected. Intravenous (IV) fluids may be used for hydration, and sometimes a soft diet or feeding tube may be necessary if there are chemical burns in the mouth or esophagus. Other treatments may include anti-vomiting medication, medications to protect the stomach, pain medication, antibiotics, and medication to protect the liver.

Some types of oils are more toxic than others, so recovery may depend on the specific oils ingested. There is no antidote for this poisoning; however, with early intervention and supportive treatment, most cats can survive.

Contributors: Dr. Charlotte Flint, DVM & Ahna Brutlag, DVM, MS, DABT, DABVT, Associate Director of Veterinary Services, Pet Poison Helpline

© Copyright 2015 LifeLearn Inc.

Treating for Fireworks and Thunderstorms in Dogs

By Uncategorized No Comments

When is the best time to start treatment?

This should be started at a time of year when fireworks or thunderstorms are not likely to occur so that you have control over the situation and time to work on your retraining program, without having to worry about how to deal with actual events.

Although the training is primarily aimed at exposing the pet to gradually more intense levels of the stimuli while it remains relaxed, pairing a specific favorite reward with each training session can help the pet to develop a positive and enjoyable association with the stimulus. By identifying and saving the pet’s special treat for each desensitization session, your dog should ultimately look forward to each new exposure to these muted levels of the stimulus (counter-conditioning).

The dog is first trained to “sit” and “watch,” lie down and relax, or go to a mat to settle in the absence of distractions. Remember to always reward the dog for performing the correct behavior. Initially food rewards may be used, but later soothing praise is the best reward. Once your dog can achieve a settled behavior and a calm emotional state, you should test the training in the face of some distraction. Some owners and handlers find that success occurs faster and more consistently throughout the program by using a restraint and control device such as a head halter. In practice, if you cannot get your pet to settle and relax in the absence of the fear-evoking stimuli, it will not be practical to begin your exposure exercises.

Training your dog to relax on a mat or bed may be particularly useful since the bedding area may further help the dog to relax and settle (e.g., go to your mat). A portable mat can be moved to other locations and used for other situations (e.g., when you are travelling or a dog during actual storms can be moved to another location if needed (e.g., when you are traveling).

How do I organize desensitization?

For fireworks fears, either you can use a variety of audio and video recordings of the noise or a cap gun, whichever is capable of reproducing the fear response. Commercial CDs are available that reproduce these sounds for desensitization.

It is important to start with a noise at a volume that does not elicit any distress. The initial sound sometimes may be barely audible.. For gunshot fears and phobias however, a cap gun or starter’s pistol may ultimately be best since it also provides the visual cue of a gun. In these instances, you can start the desensitization by playing a recording of gun sounds at a minimal volume.

This same technique can also be used for thunderstorm phobias, using a video or audio recording of an actual storm. It is much harder to reproduce a realistic thunderstorm for retraining, since noise is not the only component of a thunderstorm. During a thunderstorm, there are also changes in barometric pressure, the sound of rain on the windows, darkening skies and flashes or bolts of lightning. Please note that not all dogs will respond to desensitizing through recordings or videos.

Begin playing the recording or producing the appropriate sounds at a low volume. If your dog reacts, ignore the reaction until your pet is settled, after which it can be given a treat. Once the dog has settled, try again with a much lower volume of the stimulus. It is useful to use a head halter and leash to maintain control and ensure that the dog focuses on you.

It is important that you do not overdo it. After every few bangs, give a special treat, play with the dog, or initiate some particularly pleasurable activity. Make this the end of your first session. It is important you always end a session on a high note with a good response, even if that means turning the volume right down again.

When do I start the next session?

This depends very much on the individual dog. It can be as short a time as an hour or as long as the next day. It is important not to leave too long a gap between training sessions, but the dog must be calm and settled before another session is begun. Keep repeating the process, increasing the volume only slightly each time. You have to accept from the outset that the program will take days if not weeks or even months but eventually your dog should remain relaxed at full intensity noises.

Can drugs be helpful?

Drugs might be used in different scenarios. While the pet is being retrained, especially if there is any chance of exposure to actual stimuli (e.g., thunderstorm season) it might be advisable to use an antidepressant to help your dog cope with its phobias and to help it better focus in its training. These drugs can take a month or more to achieve efficacy so should be started well in advance. Adding natural anxiolytic compounds such as melatonin, the pheromone Adaptil or even aromatherapy might also help. Before any expected exposure to the stimuli, an anxiolytic drug might also be used on an as-needed basis.

Are there other products that might be useful?

In addition to developing a calming area and the use of desensitization CDs, other products have been developed as aids for calming dogs and reducing thunderstorm phobias. These include the Thundershirt or “anxiety wrap,” which is intended to reduce anxiety via applying pressure to the dog’s body, a “Storm Defender” cape, which is intended to reduce static associated with storms and a “Calming Cap” or Doggles which when placed over the dog’s eyes, reduces some of the visual stimuli.

Contributors: Debra Horwitz, DVM, DACVB & Gary Landsberg, DVM, DACVB, DECAWBM

© Copyright 2013 LifeLearn Inc. Used and/or modified with permission under license.

Lyme disease and prevention

By Uncategorized No Comments

Lyme disease

Lyme disease is caused by a spirochete ( a bacterium) and is transmitted through bit of a tick. Once in the bloodstream, the lyme organism travels to many parts of the body and is particular about settling in the joints and kidneys. The most common tick to carry lyme disease is the black-legged tick or “deer tick”.  Lyme disease can only be transmitted from the host (tick); meaning if your dog contracts lyme disease, he can not transfer the disease to you.

Symptoms

Some dogs portray generalized pain in their joints or muscles, they may go off feed and become lethargic. Many patients have high fevers and favor or limp on any of their legs. Symptoms may disappear for weeks at a time only to recur weeks or months later. Some patients infected may be asymptomatic for months or over a year. By this time, the organism may be widespread throughout the body.

We recommend testing dogs yearly with a 4DX or heartworm/tickborne illness blood test. The test involves a simple blood draw and running the sample through a snap test to detect antibodies created from the organism. It also tests for 2 other tick illnesses we see in our area- anaplasmosis and ehrilichia. Since lyme spirochete is a bacterium, it can easily be treated with antibiotics, typically with doxycycline.

Prevention

The key to prevention is keeping your dog from being exposed to ticks. Ticks are found in grassy, wooded, and sandy areas. They find their way onto an animal by climbing to the top of a leaf, blade of grass, or short trees. They wait until their sensors detect an approaching animal on which to crawl or drop. Keeping animals from thick underbrush reduces their exposure to ticks. Dogs should be kept on trails when walked near wooded or tall grass areas. Vaccination against Lyme disease is recommended for pets that live in endemic areas or that travel to areas where Lyme disease is prevalent. There are several products available that can help to kill these ticks and prevent disease transmission.  Our products effective monthly preventatives. This includes Frontline Gold® and and Nexgard®.

How to remove a tick?

If you find a tick attached to your pet, grasp the tick with fine tweezers or your finger nails near the dog’s skin and firmly pull it straight out. There are also tools available called Tick Twister® or Tick Key® which can be useful. However, take care to use them cautiously as twisting or jerking the tick may cause the mouth parts to break off and remain in the skin. See your veterinarian if you are unsure or unable to remove the tick from your dog. Ticks have a hard outer surface so place it in rubbing alcohol for disposal. Make sure to check your pet daily for any attached ticks.


Contributors: Ryan Llera, BSc, DVM; Ernest Ward, DVM

© Copyright 2018 LifeLearn Inc. Used and/or modified with permission under license.

House Training Puppies

By Uncategorized No Comments

How long will it take to housetrain my puppy?

All it requires are a few basic rules to house train puppies within a short amount of time, sometimes as little as a few days to a few weeks. This does not mean that the puppy will be able to be trusted to wander throughout the home without eliminating. What the puppy should quickly learn is where it should eliminate, and the consequences of eliminating indoors when the owner is supervising. However, anytime your puppy is unsupervised and eliminates indoors, this can further delay successful house training since the puppy will have learned that there are alternate indoor elimination areas that can be used without untoward consequence. The goal of house training is to encourage and reinforce desirable elimination. Do not focus on trying to teach your puppy where it is not allowed to eliminate, as there are literally hundreds of locations in your home where your puppy might have to be deterred.

It is advisable to select a site that has an easy and direct access to the outdoors. Puppies may more easily learn where to eliminate if a single location is used. Over time, the location, the surface and the small amounts of residual odor help to establish a more regular habit of returning to the area. If you do not have immediate access to the outdoors (e.g., high-rise living) or if your schedule requires that you leave your pet longer than it can control itself, you might need to train your pet to an indoor litter area. If this is your best option, you can follow the same procedures outlined below, but will instead take your pet to its litter area, rather than to the outdoors.

How do I housetrain my puppy?

1) Puppies have a strong urge to eliminate after sleeping, playing, feeding, and drinking. Take your puppy to its selected elimination area within 30 minutes of each of these activities.

In addition, although some puppies can control themselves through the entire night, most puppies need to eliminate every 3 to 4 hours during the daytime. With each passing month, you can expect your puppy to control itself a little longer between elimination times. The puppy should be taken to its elimination area, given a word or two of verbal encouragement (e.g., “Hurry up”) and as soon as elimination is completed, lavishly praised and patted. A few tasty food treats can also be given the first few times the puppy eliminates in the right spot, and then intermittently thereafter. This teaches the puppy the proper place to eliminate, and that elimination in that location is associated with rewards. Some puppies may learn to eliminate when they hear the cue words (“Hurry up”).

2)  If you take your puppy to the elimination site and your puppy is only interested in playing and investigating the environment, take the puppy indoors after about 10 minutes and strictly supervise him until you can try again, approximately each half hour. Always accompany your puppy outdoors so that you can be certain that it has eliminated. When you first start house training, be certain to reward elimination immediately upon completion and not when the puppy comes back indoors.

3)  When indoors, your puppy must be supervised so that you can see when it needs to eliminate and immediately take it outdoors to its elimination area. One of the best techniques is to leave a remote lead attached. Should pre-elimination signs (circling, squatting, sneaking off, heading to the door) occur, immediately take the dog to its elimination site, give the cue words, and reward the puppy when it eliminates. If the puppy begins to eliminate indoors you must be supervising so that you can immediately interrupt the behavior, such as with a verbal reprimand or shaker can. Then take the puppy outdoors to complete elimination at the proper site. Rather than use punishment to deter undesirable elimination, the goal is to train the puppy where to eliminate though supervision and rewards. Watch the puppy closely for signs it needs to eliminate and soon the puppy will learn to exhibit these signs to get your attention that it needs to go outdoors.

4)  When you are not available to supervise, the puppy should be confined to its confinement area. Be certain that your puppy has eliminated, and has had sufficient play and exercise before any lengthy confinement. Establish a daily routine that helps your puppy learn when it is time to play, eat, exercise, sleep, and eliminate. If the confinement area is small enough, such as a pen or crate, many puppies will have sufficient control to keep this area clean. This means that when you come to release the puppy from confinement, it must be taken directly to its elimination area. Puppies will generally avoid soiling their crate if they use their crates as a sleeping or play area. However, puppies that are anxious or distressed about being confined to the crate are likely to soil. In addition, if the area is too large or the puppy is kept in the area longer than it can wait to eliminate, the puppy may soil in a portion of the confinement area.

What do I do if I find some stool or urine in an inappropriate spot?

There is no point in punishing or even pointing out the problem to the puppy. Only if the puppy is in the act of elimination will it understand the consequences (rewards or punishment). In fact, it is not the puppy that has erred. Put the puppy elsewhere, clean up the mess, and vow to supervise the puppy more closely in the future.

When will I be able to trust my puppy to wander loose throughout the home?

Generally you will want your dog to have been error free around the house for about a month before you can begin to decrease your confinement and supervision. The first time you leave the puppy unsupervised should be just after taking the dog outdoors for elimination. Gradually increase the length of time that your dog is allowed to roam through the home without supervision while you are home. If the dog has been able to go unsupervised for a couple of hours without an “accident,” it might then be possible to begin going out for short periods of time. Of course, if the dog still investigates and chews, then confinement and supervision may still be necessary.

Contributors: Debra Horwitz, DVM, Diplomate ACVB & Gary Landsberg, DVM, Diplomate ACVB

© Copyright 2017 LifeLearn Inc. Used and/or modified with permission under license.

Dental Disease in Dogs

By Uncategorized No Comments

1How common is dental disease in dogs?

Dental disease is one of the most common medical conditions seen by veterinarians. Over 80% of dogs over the age of three have active dental disease.

Few dogs show obvious signs of dental disease, so it is up to the dog’s family and veterinarian to uncover this hidden and often painful condition.

Are dental problems the same in pets and people?

No. In people, the most common problem is tooth decay which is due to the loss of calcium from the tooth’s enamel, resulting in painful, infected cavities (caries). In dogs, tooth decay is rare representing less than 10% of all dental problems. The most common dental problems seen in dogs are periodontal disease and fratured teeth.

3

What is periodontal disease?

Periodontal disease is a term used to describe inflammation or infection of the tissues surrounding the tooth. Periodontal diseases occur when the accumulation of plaque and tartar cause either periodontal pockets or gum recession around the tooth’s attachment. Left untreated, the infection often spreads deeper into the tooth socket, destroying the bone. Ultimately, the tooth becomes loose and may fall out over time.

Is periodontal disease very common?

It is estimated that more than two-thirds of dogs over three years of age suffer from some degree of periodontal disease, making it by far the most common disease affecting pet dogs.

How does tartar form and why is it a problem?

The mouth is home to thousands of bacteria. As these bacteria multiply on the tooth’s surface, they form an invisible layer called plaque or biofilm. Some of this plaque is removed naturally by the dog’s tongue and chewing habits.

If allowed to remain on the tooth’s surface, plaque thickens, becomes mineralized and creates tartar. This tartar accumulates above and below the gum line leading to inflammation (gingivitis) and further accumulation of plaque which leads to periodontal diseases.

Can plaque and tartar be prevented?

The rate at which plaque becomes mineralized is much quicker in some dogs than in others.

The best way to prevent tartar build-up is through daily tooth brushing using canine toothpaste that is specifically designed to be swallowed. Unfortunately, even though it is the best form of plaque control, most dog owners do not brush their dog’s teeth daily.

Special dog chew toys and treats may also help reduce or delay plaque and tartar build-up. Some pet foods have been specifically formulated as dental diets that mechanically and/or chemically assist in plaque removal. Water additives are also available.

The Veterinary Oral Health Council evaluates dental products for effectiveness. You can visit their website (www.vohc.org) for a list of plaque control products. Your veterinarian can help you decide which options are right for you and your dog.

Will feeding dry food remove tartar?

Pet food manufacturers have recently developed new dental diets that can help reduce the formation of plaque and tartar in your dog. Once tartar has formed, however, professional scaling and polishing under general anesthesia will be needed.

 tooth-plaque_updated2017-01

What is involved with a routine dental cleaning?

A routine dental cleaning involves a thorough dental examination, followed by a dental scaling and polishing to remove the plaque and tartar from all tooth surfaces. Your veterinarian will perform pre-anesthetic blood tests to ensure that kidney and liver function are satisfactory for anesthesia. Sometimes antibiotic treatment is started before the periodontal therapy is performed. Your veterinarian will discuss the specific pre-dental recommendations for your pet.

Once your dog is anesthetized, your veterinarian will thoroughly examine the mouth, noting the alignment of the teeth and the extent of tartar accumulation both above and below the gumline. Your veterinarian may also wish to perform dental radiographs to assess the viability of the tooth root and surrounding bone. If periodontal disease is severe, it may not be possible to save badly affected teeth, which may need to be extracted. Next, tooth scaling will be performed using both traditional hand scalers and ultrasonic cleaning equipment to remove all traces of tartar, both above and below the gum line. The tartar below the gum line causes the most significant gum recession and it is extremely important that it is removed thoroughly.

After scaling, the teeth are polished to remove microscopic scratches in order to help prevent subsequent plaque build-up. Special applications such as fluoride, antibiotic preparations, and cleaning compounds may be indicated to decrease tooth sensitivity, strengthen enamel, treat bacterial infection, and reduce future plaque accumulation.

What do broken, chipped, or fractured teeth look like in dogs?

The center of the tooth, called pulp, is covered by hard dentin and even harder enamel. Fractures either expose sensitive dentin, termed uncomplicated fractures, or the pulp which contains nerves and blood vessels, termed complicated fractures.

7    8

What causes fractured teeth in dogs?

Most tooth fractures occur when dogs chew on objects that are too hard, like ice cubes, bones, nylon chews, antlers, and horse hoofs. Any chew toy or dental treat fed to a dog should bend and “give” upon compression.

What is done to treat fractured dog teeth?

If the pulp is exposed, root canal therapy or extraction of the tooth are the treatment options. Leaving the tooth without treatment is not a good idea, as infection will have direct entry into your dog.

With gentleness, patience, and perseverance you can provide the oral care your dog needs to prevent dental disease.

Urinary Tract Infections in Cats

By Uncategorized No Comments

I noticed a change in my cat’s urination habits, and I saw blood in her urine, but are there other ways to tell that a cat has a UTI?

There are several important signs that something could be wrong with a cat’s urinary tract, including the possibility of a UTI. These signs include:

  • Frequently passing small amounts of urine
  • Straining to urinate
  • Blood in the urine
  • Crying out or whining while urinating
  • Urinating inappropriately (e.g., throughout the house)
  • Licking the genitals
  • Stronger than normal urine odor


While urinary tract disorders are fairly common in cats, urinary tract infections (UTIs) are fairly uncommon. Cats with UTIs generally attempt to urinate very frequently whenever they go to the litter box, they may strain to urinate, they may cry out or whine when urinating if it is painful, and there may be blood visible in their urine. A break in litter box training is also a red flag that something is wrong in the bladder. Finally, frequent licking of the genitals may signal that a UTI is present.

Generally, a UTI occurs when bacteria travel up the urethra and into the bladder. Urine in the bladder is sterile, but once bacteria find their way to the bladder, the bacteria can grow and reproduce. Some cats will develop bladder stones, with or without a UTI, and this opens the door for additional health issues.

A microscope can reveal so much important information about the urine when a UTI is suspected. Once parameters like urine-specific gravity (concentration), pH (acid-base balance), ketones, glucose (sugar in the urine), bilirubin (a breakdown product of blood), blood, and protein are measured, the urine specimen is placed into a centrifuge and spun. This allows cells and other debris to accumulate at the bottom of the tube. That debris can then be evaluated under magnification, and this examination can reveal the presence of red blood cells, white blood cells, bacteria, and crystals.

What is seen under the microscope can lead to the next steps of assessing the cat’s urinary tract disease. For instance, if there are crystals in the urine, or if there is no evidence of bacteria, your veterinarian may recommend X-rays of the abdomen in order to look for bladder stones.

My veterinarian sent a sample of urine to a laboratory for what she called a “culture and sensitivity” test. What is this?

All urinary tract infections are NOT created equal. Even though the most common organism to cause UTIs in cats is Escherichia coli, there are several other organisms that may be involved.  The only way to identify what the specific bacteria is to grow it in a laboratory and test the bacteria against various tiny samples of commonly used antibiotics. Only then can we be certain that we have made the best choice for treatment. Fortunately we can do this lab testing in our clinic.

Often, we will prescribe an antibiotic that is among the most commonly used for treating UTIs in order to try to provide immediate relief to the cat. Once the culture and sensitivity results are received, an appropriate antibiotic will be prescribed. After the course of antibiotics is given, it is important to recheck the urine to confirm that the infection is resolved. If not, then it will be important to investigate additional issues that may contribute to a persistent UTI and repeat antibiotics.

Are some cats predisposed to UTIs?

Older female cats and cats with diabetes mellitus (‘sugar diabetes’) develop UTIs more commonly than the general population. Cats who have bladder stones are prone to recurrent UTIs, pointing out the importance of getting a complete diagnosis whenever there is evidence of disease in the urinary tract. Bladder stones must be removed or dissolved with a special prescription diet in order to restore bladder health.

What can I do to prevent a UTI from occurring in the future?

There is evidence that specific nutritional formulations can support lower urinary tract health as well as medications to lower the pH of the urine. It is best to discuss UTI prevention and bladder health with your veterinarian in order to implement strategies that have been demonstrated to be effective.


Contributors: Robin Downing, DVM, DAAPM, DACVSMR, CVPP, CRPP

© Copyright 2016 LifeLearn Inc. Used and/or modified with permission under license.

Flea control and prevention

By Uncategorized No Comments

My dog always seems to have fleas. What can I do?

Successful flea control involves both eliminating fleas from your dog and controlling fleas in your dog’s environment. Dogs and cats share the same fleas, and fleas can travel from one animal to another. Therefore, it is important that all pets in your home are on a flea preventive program.

Treating your pet for fleas has never been easier. With the many choices available today, your veterinarian can provide you with the safest and most effective flea preventive for your pet’s needs.

However, when it comes to environmental control, it is important to understand the flea life cycle.

What is the life cycle of the flea?

There are four stages to the flea life cycle: egg, larva, pupa, and adult.

Flea eggs are whitish and about 1/32″ (0.5 mm) in length. They are unlikely to be seen without a magnifying glass. Adult fleas lay eggs after eating a blood meal. The eggs are initially laid on the dog’s skin but fall off into the environment to continue their life cycle. Flea eggs make up about half of the total flea population. Eggs may hatch in as little as 14 to 28 days, depending on environmental conditions. High humidity and temperature favor rapid hatching.

Flea larvae are about 1/8″ to 1/4″ (2-5 mm) in length. They have a whitish body and a black head. They feed on organic debris found in their environment and on adult flea feces. They do not like bright light and move deep into carpet fibers or under furniture, organic debris, grass, branches, leaves, and soil. Flea larvae prefer warm, dark, and moist areas. Outdoors, larval development occurs only in shaded, moist areas where flea infested pets spend a significant amount of time. Our climate-controlled homes offer an ideal environment for the flea larvae to thrive.

Flea pupae produce a protective silk-like cocoon that is sticky. It quickly becomes coated with grime and debris, which act as camouflage. With warmth and humidity, pupae become adult fleas in 5-10 days. The adults do not emerge from the cocoon unless stimulated by physical pressure, vibrations, carbon dioxide, or heat. This is important since once fleas emerge from the cocoon they can only survive for a few days unless they are able to feed. Pre-emergent adult fleas can survive within the cocoon for up to 9 months. During this time, they are resistant to many insecticides applied to the environment. This is important to remember because adult fleas may emerge from their pupae into the environment long after you have applied insecticides in your home.

Once it emerges, the adult flea, unlike the larva, is attracted to light and heads to the surface in order to encounter a passing host to feed upon. Two days after the first blood meal, female fleas begin egg production. In normal circumstances the adult female will live up to three weeks, laying approximately 40 eggs per day. The entire life cycle, from egg to adult flea can be completed in as little as 14-28 days depending on environmental conditions.

Apart from irritation, are fleas particularly harmful?

Fleas can cause anemia in heavy infestations, especially in young or debilitated dogs. A single female flea can consume up to 15 times her body weight in blood over the several weeks of her adult life. In addition, fleas can carry several diseases, including plague, and they act as hosts for one of the most common tapeworms of the dog and cat, Dipylidium caninum.

How do I treat my dog if he has fleas?

Successful flea control includes treating both your pet(s) and the environment. Shampoos, sprays, powders, and topical preparations are all available. We carry Nexgard chewable tablets and topical frontline.

flea_control_3_2009


ALWAYS READ THE LABEL CAREFULLY – apply the product as instructed and repeat at the intervals stated. If you have cats in your home that you are treating, ensure that the product is labelled for use in cats, as some dog products may be poisonous to cats. It is also important to treat with the correct weight range appropriate for your pet.

What about the environment?

Environmental preparations are becoming increasingly sophisticated. Most quick kill products are only effective against the adult flea. Your veterinarian can provide you with flea products that contain insect growth regulators (IGRs) that will prevent larvae from developing into adults, in addition to chemicals that will kill the adult fleas.

Before applying any environmental product, vacuum your carpet to stimulate the pre-adult fleas to emerge from their protective cocoons. Be sure to discard the vacuum cleaner bag after its use, or empty your canister vacuum outside.

The newer topical and oral flea preventives will greatly assist you in solving your flea problem. By understanding the flea life cycle and following your veterinarian’s recommendations, you and your pet will be flea free in no time.